Connecting Up PocketBeagle#
This section provides instructions on how to hook up your board. The most common scenario is tethering PocketBeagle to your PC for local development.
What’s In the Package#
In the package you will find two items as shown in figures below.
PocketBeagle
Getting Started instruction card with link to the support URL.
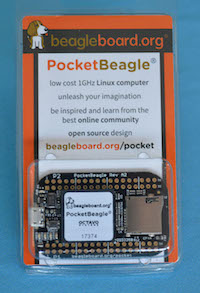
Fig. 271 PocketBeagle Package#
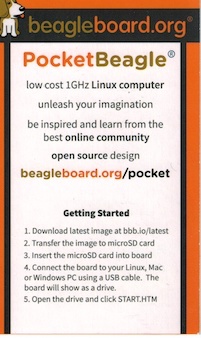
Fig. 272 PocketBeagle Package Insert front#
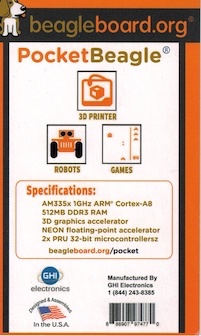
Fig. 273 PocketBeagle Package Insert back#
Connecting the board#
This section will describe how to connect to the board. Information can also be found on the Quick Start Guide that came in the box. Detailed information is also available at beagleboard.org/getting-started
The board can be configured in several different ways, but we will discuss the most common scenario. Future revisions of this document may include additional configurations.
Tethered to a PC using Debian Images#
In this configuration, you will need the following additional items:
microUSB to USB Type A Cable
microSD card (>=4GB and <128GB)
The board is powered by the PC via the USB cable, no other cables are required. The board is accessed either as a USB storage drive or via a web browser on the PC. You need to use either Firefox or Chrome on the PC, IE will not work properly. Figure below shows this configuration.
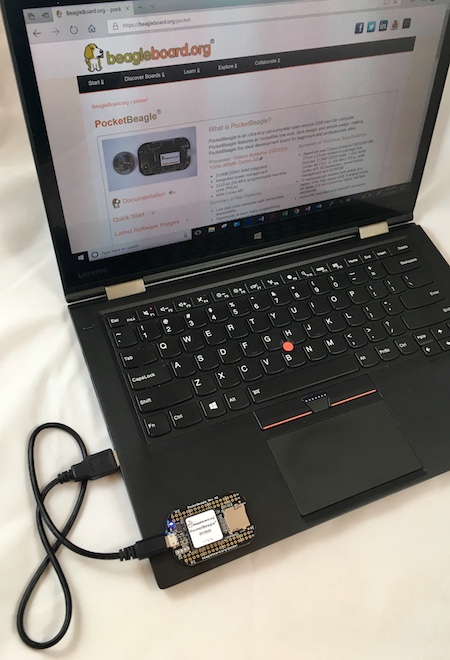
Fig. 274 Tethered Configuration#
In some instances, such as when additional add-on boards, or PocketCapes are connected, the PC may not be able to supply sufficient power for the full system. In that case, review the power requirements for the add-on board/cape; additional power may need to be supplied via the 5v input, but rarely is this the case.
Getting Started#
The following steps will guide you to quickly download a PocketBeagle software image onto your microSD card and get started writing code.
1. Navigate to the Getting Started Page beagleboard.org/getting-started Follow along with the instructions and click on the link noted in Figure 5 below www.beagleboard.org/distros. You can also get to this page directly by going to bbb.io/latest
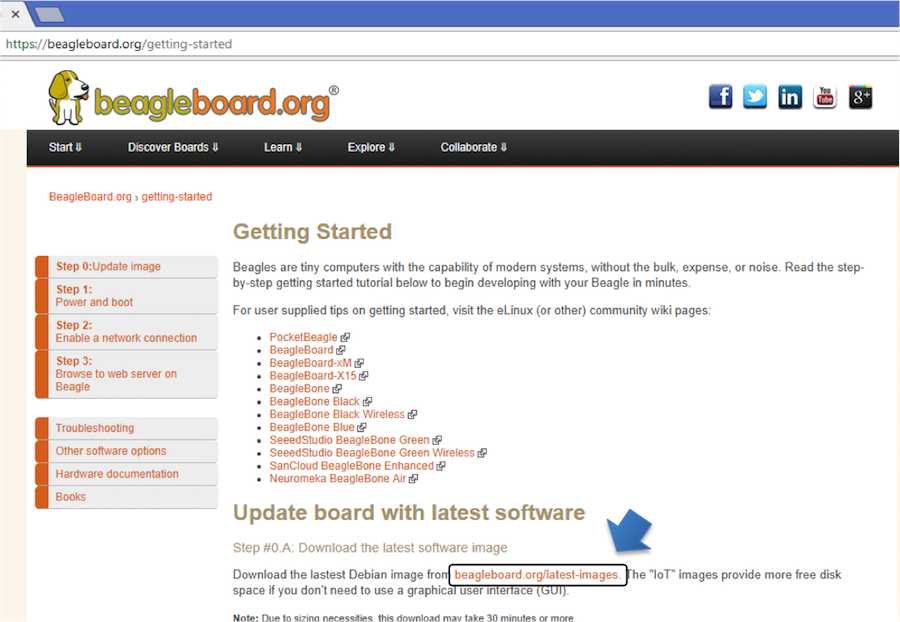
Fig. 275 Getting Started Page#
1. Download the latest image onto your computer by following the link to
the latest image and click on the Debian image for Stretch IoT (non-GUI)
for BeagleBone and PocketBeagle via microSD card. See Figure 6 below.
This will download a .img.xz file into the downloads folder of your
computer.
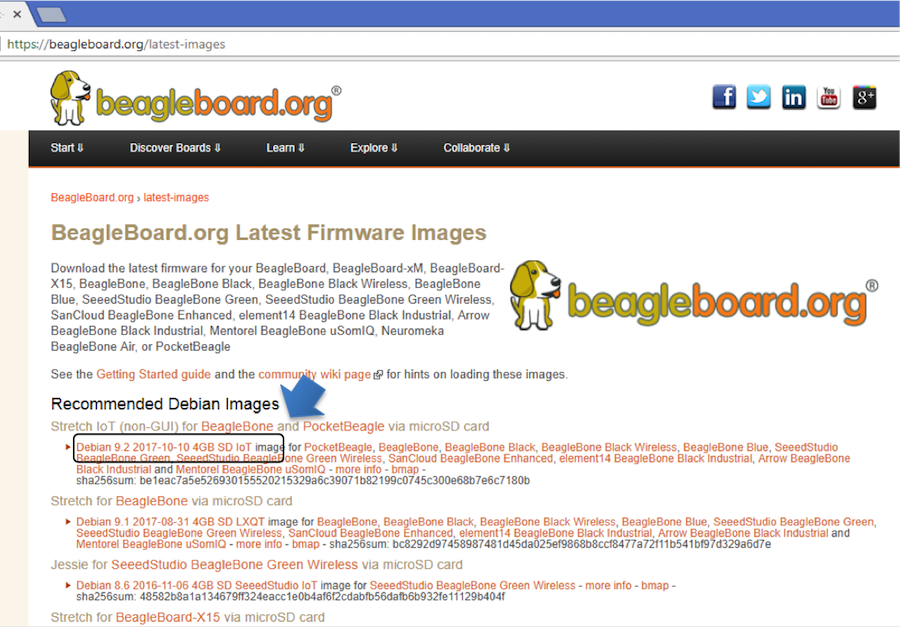
Fig. 276 Download Latest Software Image#
Transfer the image to a microSD card.
Download and install an SD card programming utility if you do not already have one. We like https://etcher.io/ for new users and so we show that one in the steps below. Go to your downloads folder and doubleclick on the .exe file and follow the on-screen prompts. See figure 7.
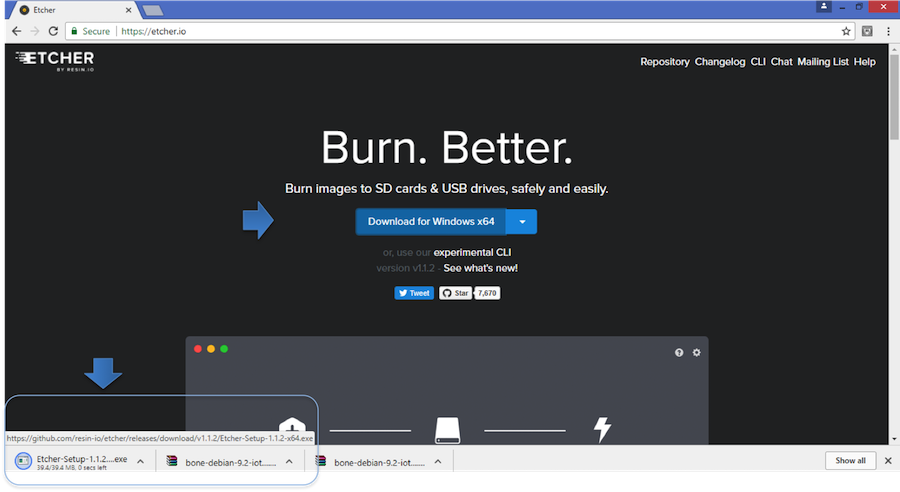
Fig. 277 Download Etcher SD Card Utility#
Insert a new microSD card into a card reader/writer and attach it via the USB connection to your computer. Follow the instructions on the screen for selecting the .img file and burning the image from your computer to the microSD card. Eject the SD card reader when prompted and remove the card. See Figures 8 and 9.

Fig. 278 Select the PocketBeagle Image#

Fig. 279 Burn the Image to the SD Card#
1. Insert the microSD card into the board - you’ll hear a satisfying click when it seats properly into the slot. It is important that your microSD card is fully inserted prior to powering the system.
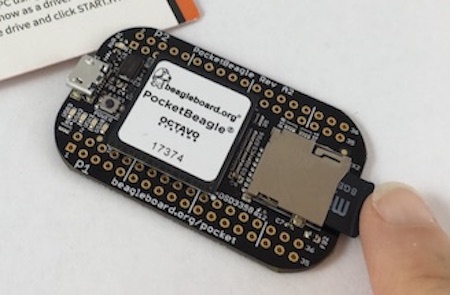
Fig. 280 Insert the microSD Card into PocketBeagle#
1. Connect the micro USB connector on your cable to the board as shown in Figure 11. The microUSB connector is fairly robust, but we suggest that you not use the cable as a leash for your PocketBeagle. Take proper care not to put too much stress on the connector or cable.
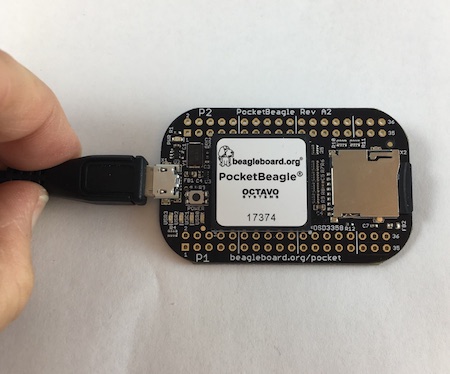
Fig. 281 Insert the micro USB Connector into PocketBeagle#
1. Connect the large connector of the USB cable to your Linux, Mac or Windows PC USB port as shown in Figure 12. The board will power on and the power LED will be on as shown in Figure 13 below.
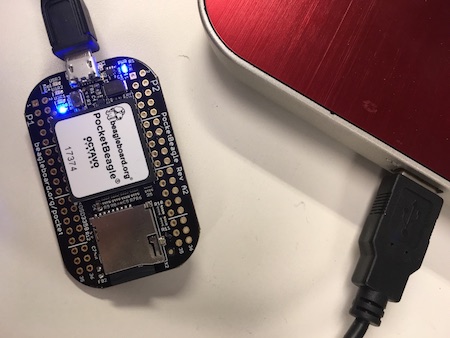
Fig. 282 Insert the USB connector into PC#
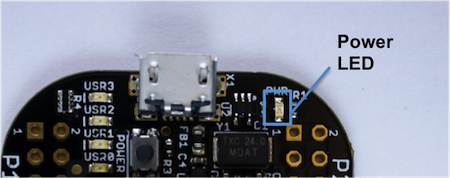
Fig. 283 Board Power LED#
1. As soon as you apply power, the board will begin the booting process and the userLEDs Figure 14 will come on in sequence as shown below. It will take a few seconds for the status LEDs to come on, like teaching PocketBeagle to ‘stay’. The LEDs will be flashing as it begins to boot the Linux kernel. While the four user LEDs can be over written and used as desired, they do have specific meanings in the image that you’ve initially placed on your microSD card once the Linux kernel has booted.
USER0 is the heartbeat indicator from the Linux kernel.
USER1 turns on when the microSD card is being accessed
USER2 is an activity indicator. It turns on when the kernel is not in the idle loop.
USER3 idle
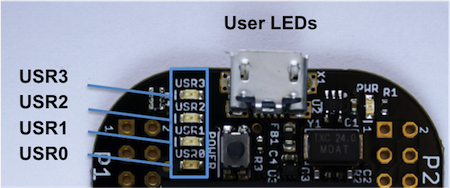
Fig. 284 User LEDs#
Accessing the Board and Getting Started with Coding#
The board will appear as a USB Storage drive on your PC after the kernel has booted, which will take approximately 10 seconds. The kernel on the board needs to boot before the port gets enumerated. Once the board appears as a storage drive, do the following:
Open the USB Drive folder to view the files on your PocketBeagle.
Launch Interactive Quick Start Guide.
Right Click on the file named START.HTM and open it in Chrome or Firefox. This will use your browser to open a file running on PocketBeagle via the microSD card. You will see file:///Volumes/BEAGLEBONE/START.htm in the url bar of the browser. See Figure 15 below. This action displays an interactive Quick Start Guide from PocketBeagle.
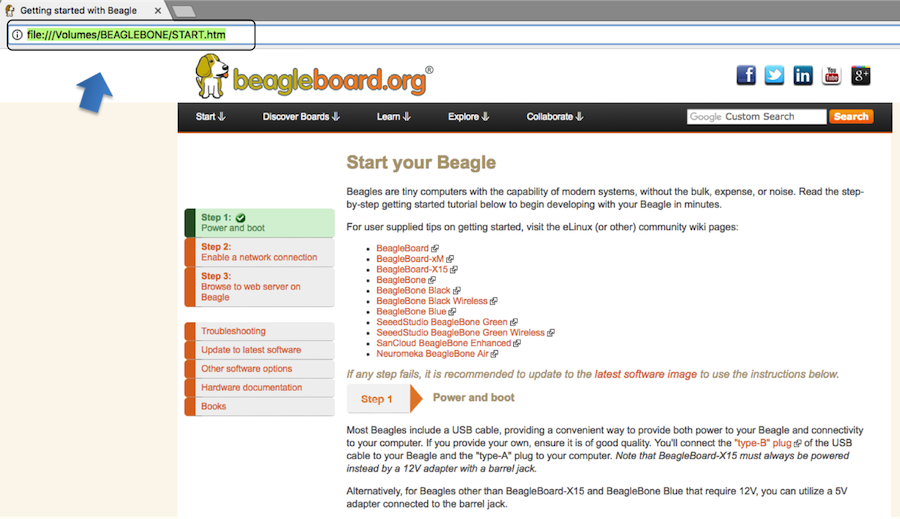
Fig. 285 Interactive Quick Start Guide Launch#
Enable a Network Connection.
Click on ‘Step 2’ of the Interactive Quick Start Guide page to follow instructions to “Enable a Network Connection” (pointing to the DHCP server that is running on PocketBeagle). Copy the appropriate IP Address from the chart (according to your PC operating system type) and paste into your browser then add a :3000 to the end of it. See example in Figure 16 below. This will launch from PocketBeagle one of it’s favorite Web Based Development Environments, Visual Studio Code, (Figure 17) so that you can teach your beagle new tricks!
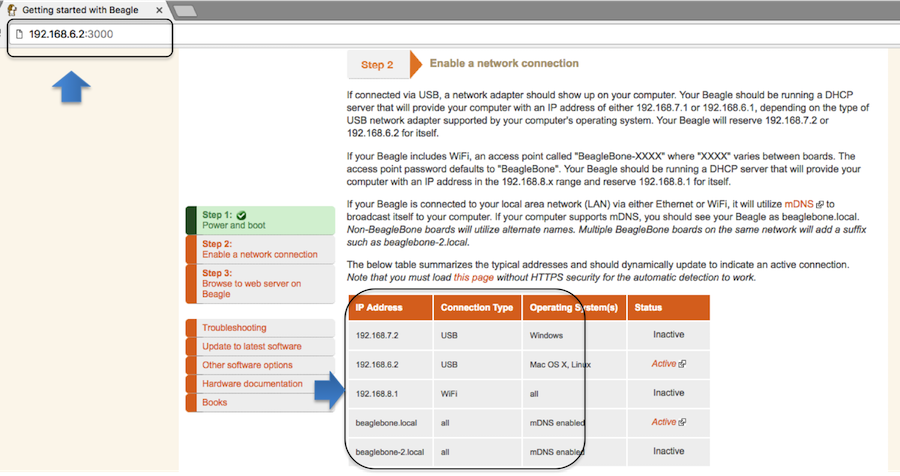
Fig. 286 Enable a Network Connection#
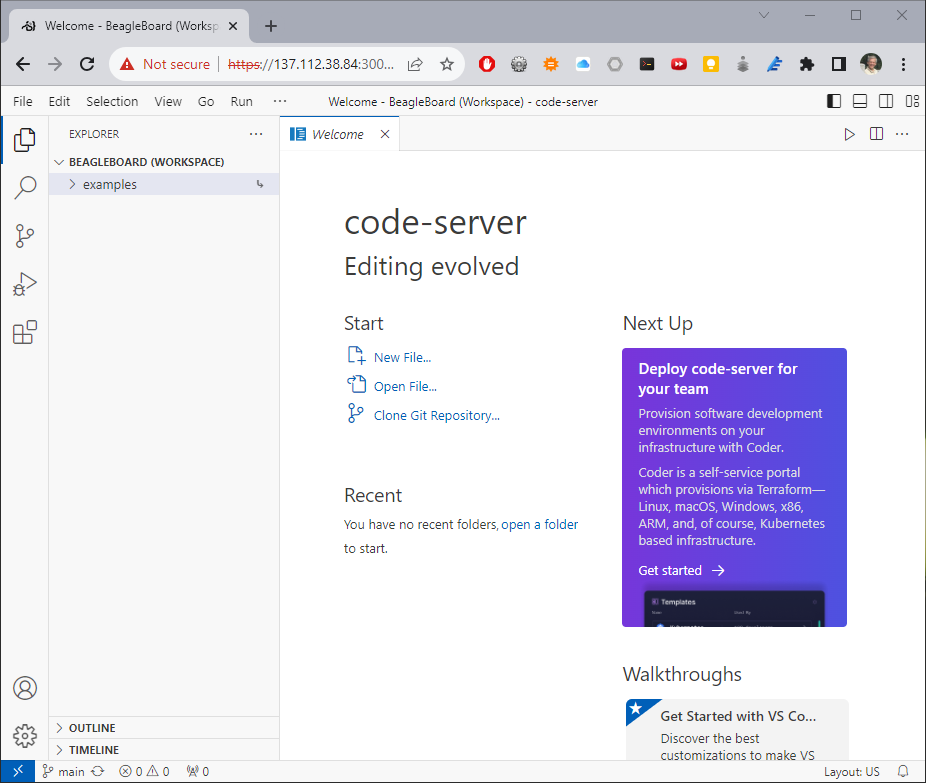
Fig. 287 Launch Visual Studio Code IDE#
Get Started Coding with Visual Studio Code IDE - blinking USR LEDs in Python.
Navigate to the code. Select
examples/BeagleBone/Black/seqLEDs.py.
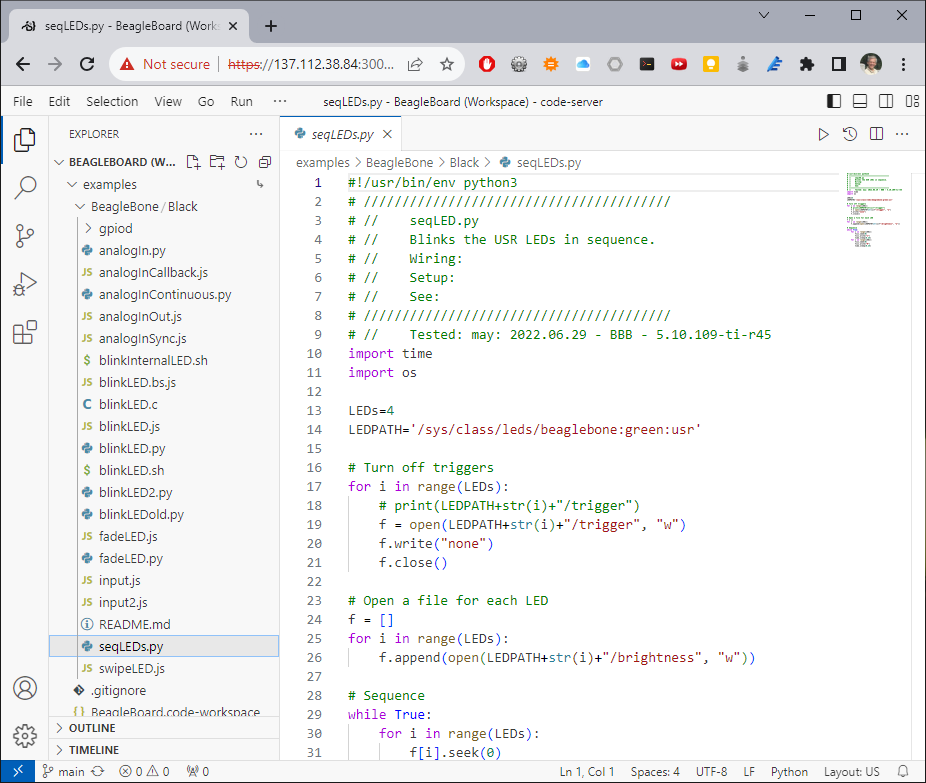
The code should match the code below, if you can’t find it, copy and paste the below code into the editor
#!/usr/bin/env python3
# ////////////////////////////////////////
# // seqLED.py
# // Blinks the USR LEDs in sequence.
# // Wiring:
# // Setup:
# // See:
# ////////////////////////////////////////
# // Tested: may: 2022.06.29 - BBB - 5.10.109-ti-r45
import time
import os

LEDs=4
LEDPATH='/sys/class/leds/beaglebone:green:usr'

# Turn off triggers
for i in range(LEDs):
   # print(LEDPATH+str(i)+"/trigger")
   f = open(LEDPATH+str(i)+"/trigger", "w")
   f.write("none")
   f.close()

# Open a file for each LED
f = []
for i in range(LEDs):
   f.append(open(LEDPATH+str(i)+"/brightness", "w"))

# Sequence
while True:
   for i in range(LEDs):
      f[i].seek(0)
      f[i].write("1")
      time.sleep(0.25)
   for i in range(LEDs):
      f[i].seek(0)
      f[i].write("0")
      time.sleep(0.25)
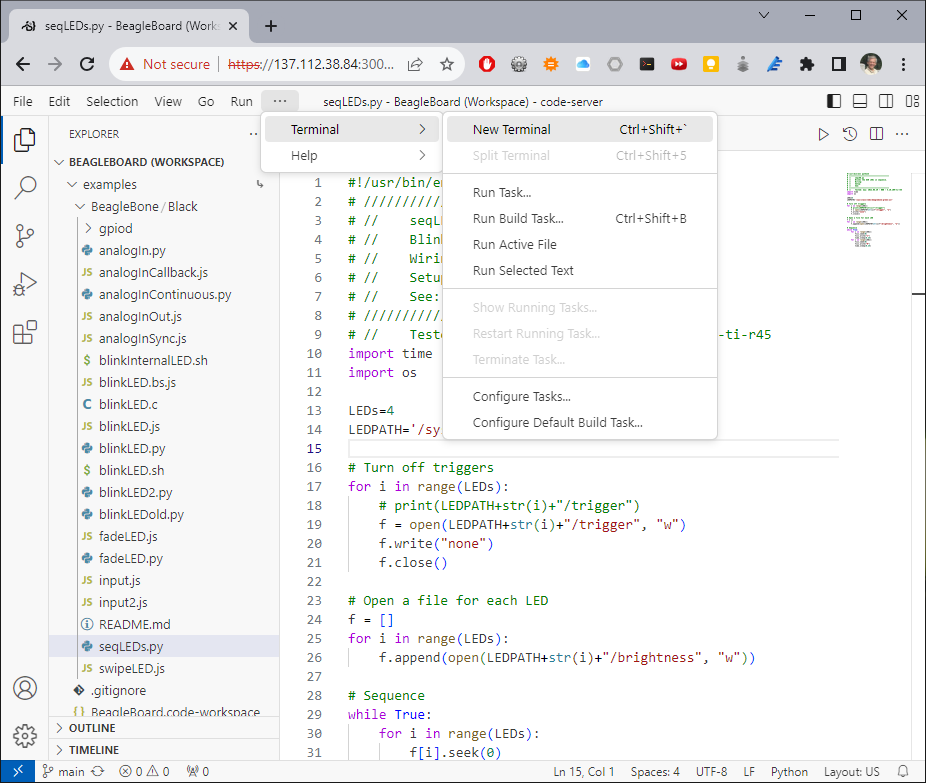
Open a terminal by selecting Terminal/New Terminal
(or pressing Ctrl+Shift+`) and execute the code:
bone:~$ cd ~/examples/BeagleBone/Black
bone:~$ ./seqLEDs.py
You will see the four USR LEDs flashing.
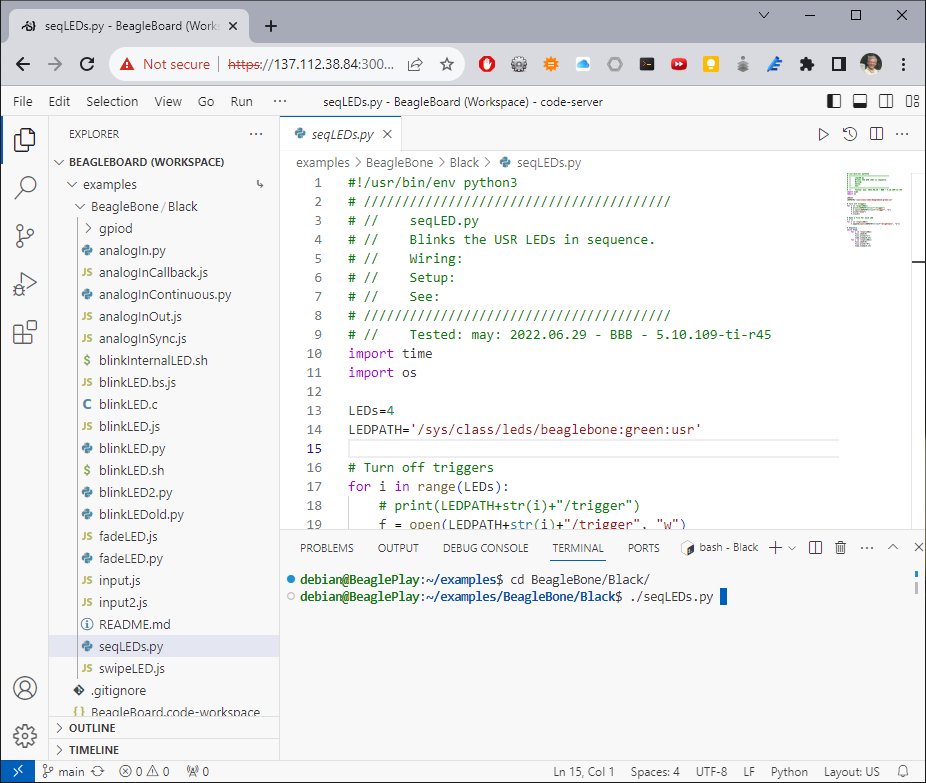
Type CTRL+C to stop the program running.
Powering Down#
1. Standard Power Down Press the power button momentarily with a tap.
The system will power down automatically. This will shut down your
software with grace. Software routines will run to completion.
| The Standard Power Down can also be invoked from the Linux command
shell via sudo halt.
2. Hard Power Down Press the power button for 10 seconds. This will force an immediate shut down of the software. For example you may lose any items you have written to the memory. Holding the button longer than 10 seconds will perform a power reset and the system will power back on.
3. Remove the USB cable Remember to hold your board firmly at the USB connection while you remove the cable to prevent damage to the USB connector.
4. Powering up again. If you’d like to power up again without removing the USB cable follow these instructions:
If you used Step 1 above to power down, to power back up, hold the power button for 10 seconds, release then tap it once and the system will boot normally.
If you used Step 2 above to power down, to power back up, simply tap the power button and the system will boot normally.
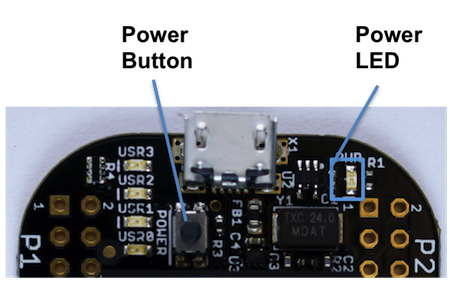
Fig. 288 Power Button#
Other ways to Connect up to your PocketBeagle#
The board can be configured in several different ways. Future revisions of this document may include additional configurations.
As other examples become documented, we’ll update them on the Wiki for PocketBeagle PocketBeagle WiKi See also the on-line discussion.
